Setting up the AWS SDK for Swift
The AWS SDK for Swift is a cross-platform, open source Swift
The SDK package is imported into your project using the Swift Package Manager
When you’ve finished following the steps in this article, or have confirmed that everything is configured as described, you’re ready to begin developing using the AWS SDK for Swift.
Overview
To make requests to AWS using the AWS SDK for Swift, you need the following:
-
An active AWS account.
-
A user in IAM Identity Center with permission to use the AWS services and resources your application will access.
-
A development environment with version 5.9 or later of the Swift toolchain. If you don’t have this, you’ll install it as part of the steps below.
-
Xcode users need version 15 or later of the Xcode application. This includes Swift 5.9.
After finishing these steps, you’re ready to use the SDK to develop Swift projects that access AWS services.
Setting up AWS access
Before installing the Swift tools, configure your environment to let your project access AWS services. This section covers creating and configuring your AWS account, preparing IAM Identity Center for use, and setting the environment variables used by the SDK for Swift to fetch your access credentials.
Sign up for an AWS account
To get started with AWS, you need an AWS account. For information about creating an AWS account, see Getting started with an AWS account in the AWS Account Management Reference Guide.
Grant programmatic AWS account access
Users need programmatic access if they want to interact with AWS outside of the AWS Management Console. The way to grant programmatic access depends on the type of user that's accessing AWS.
To grant users programmatic access, choose one of the following options.
| Which user needs programmatic access? | To | By |
|---|---|---|
| IAM | (Recommended) Use console credentials as temporary credentials to sign programmatic requests to the AWS CLI, AWS SDKs, or AWS APIs. |
Following the instructions for the interface that you want to use.
|
|
Workforce identity (Users managed in IAM Identity Center) |
Use temporary credentials to sign programmatic requests to the AWS CLI, AWS SDKs, or AWS APIs. |
Following the instructions for the interface that you want to use.
|
| IAM | Use temporary credentials to sign programmatic requests to the AWS CLI, AWS SDKs, or AWS APIs. | Following the instructions in Using temporary credentials with AWS resources in the IAM User Guide. |
| IAM | (Not recommended) Use long-term credentials to sign programmatic requests to the AWS CLI, AWS SDKs, or AWS APIs. |
Following the instructions for the interface that you want to use.
|
For more advanced cases regarding configuring the credentials and Region, see The .aws/credentials and .aws/config files, AWS Region, and Using environment variables in the AWS SDKs and Tools Reference Guide.
Note
If you plan to develop a macOS desktop application, keep in
mind that due to sandbox restrictions, the SDK is unable to
access your ~/.aws/config and
~/.aws/credentials files, as there is no
entitlement available to grant access to the
~/.aws directory. See Security and authentication when testing on macOS for details.
Setting up your Swift development environment
The SDK requires at least version 5.9 of Swift. This can be installed either standalone or as part of the Xcode development environment on macOS.
-
Swift 5.9 toolchain or newer.
-
If you're developing on macOS using Xcode, you need a minimum of Xcode 15.
-
An AWS account. If you don’t have one already, you can create one using the AWS portal
.
Prepare to install Swift
This isn't necessary on macOS.
The Swift install process for Linux doesn't automatically install
libcrypto version 1.1, even though it's required by the
compiler. To install it, be sure to install OpenSSL 1.1 or later, as
well as its development package. Using the yum package
manager, for example:
$ sudo yum install openssl openssl-devel
Using the apt package manager:
$ sudo apt install openssl libssl-dev
Installing Swift
On macOS, the easiest way to install Swift is to simply install
Apple’s Xcode IDE, which includes Swift and all the standard
libraries and tools that go with it. This can be found on the macOS
App Store
If you’re using Linux or Windows, or don’t want to install Xcode
on macOS, the Swift organization’s web site has detailed
instructions to install
and set up the Swift toolchain
Checking the Swift tools version number
If Swift is already installed, you can verify the version number
using the command swift --version. The output will look
similar to one of the following examples.
Checking the Swift version on macOS
$ swift --version
swift-driver version: 1.87.1 Apple Swift version 5.9 (swiftlang-5.9.0.128.108 clang-1500.0.40.1)
Target: x86_64-apple-macosx14.0
Checking the Swift version on Linux
$ swift --version
Swift version 5.8.1 (swift-5.8.1-RELEASE)
Target: x86_64-unknown-linux-gnu
For more information about the configuration and credentials files shared among the AWS Command Line Interface and the various AWS SDKs, see the AWS SDKs and Tools Reference Guide.
Adding the AWS SDK for Swift as a dependency
To add AWS SDK for Swift as a dependency to your Swift package, follow the steps in Creating a simple application using the AWS SDK for Swift.
To add AWS SDK for Swift as a dependency to your Xcode project, follow the steps in Integrating with Apple platforms using the AWS SDK for Swift.
Security and authentication when testing on macOS
Configuring the App Sandbox
If your SDK for Swift project is a desktop application that you’re building in Xcode, you will need to enable the App Sandbox capability and turn on the "Outgoing Connections (Client)" entitlement so that the SDK can communicate with AWS.
First, open the macOS target’s Signing & Capabilities panel, shown below.
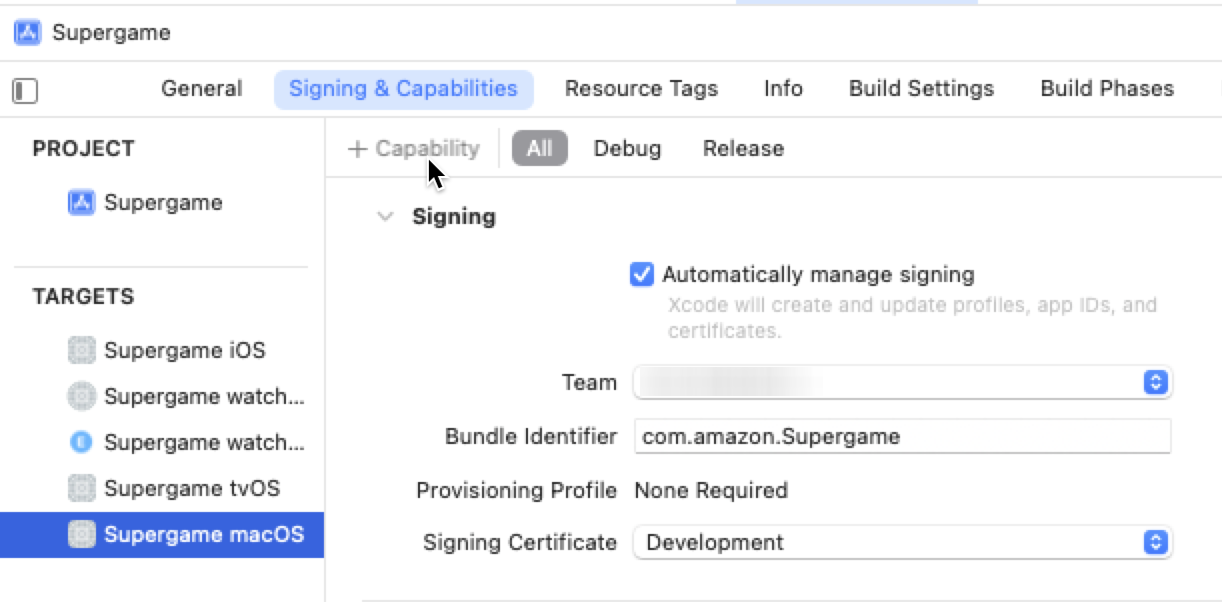
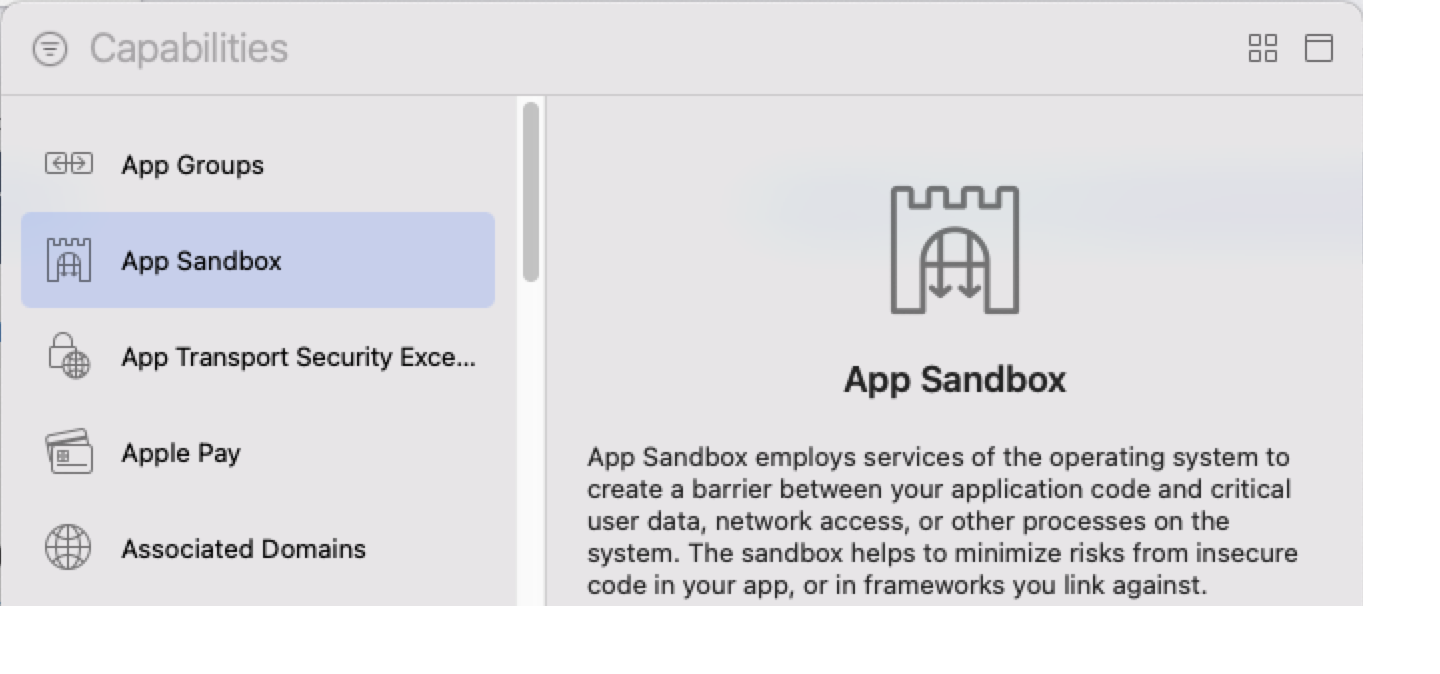
Click the + Capability button near the top left of this panel to bring up the box listing the available capabilities. In this box, locate the "App Sandbox" capability and double-click on it to add it to your target.
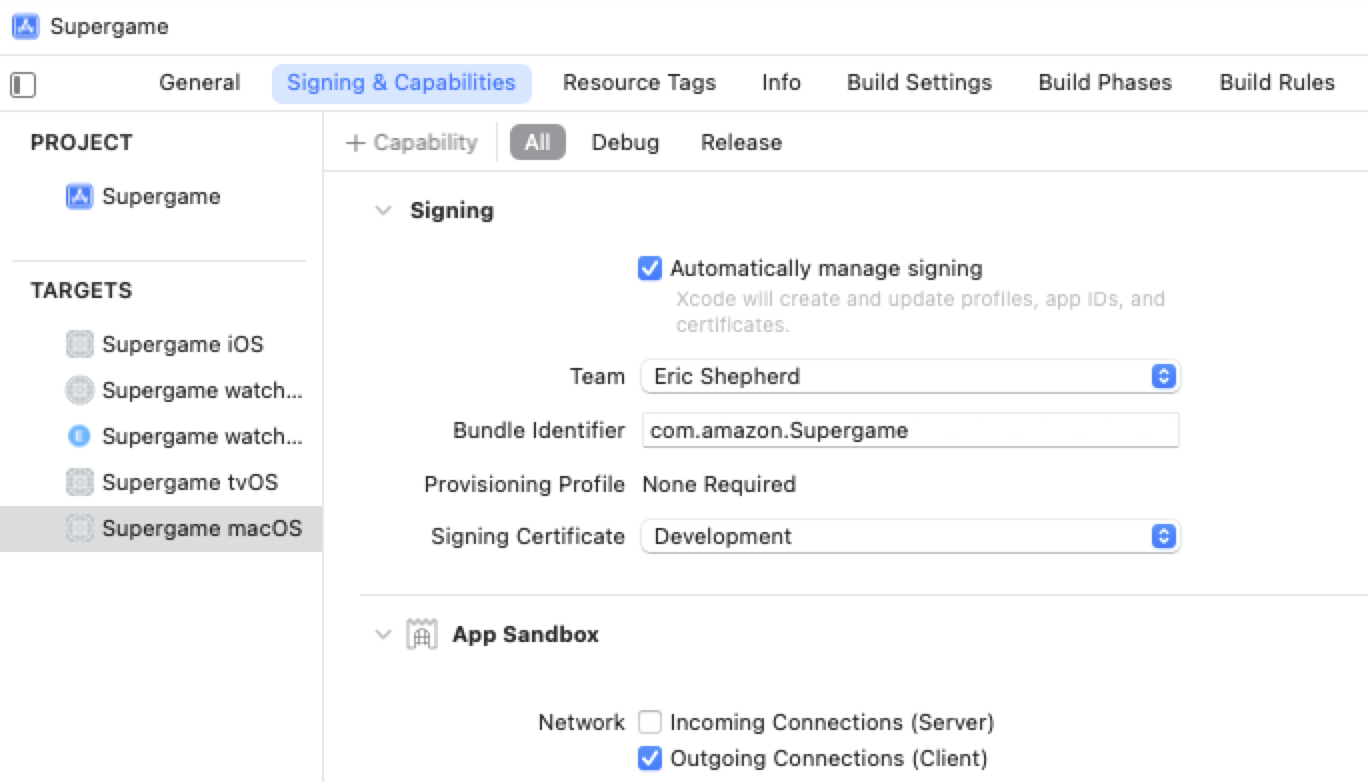
Next, back in your target’s Signing & Capabilities panel, find the new App Sandbox section and make sure that next to Network, the Outgoing Connections (Client) checkbox is selected in the following image.
Using AWS access keys on macOS
Although shipping applications should use AWS IAM Identity Center, Amazon Cognito Identity, or similar technologies to handle authentication instead of requiring the direct use of AWS access keys, you may need to use these low-level credentials during development and testing.
macOS security features for desktop applications don’t allow
applications to access files without express user permission, so the
SDK can’t automatically configure clients using the contents of the
CLI’s ~/.aws/config and
~/.aws/credentials files. Instead, you need to
use the AWS_ACCESS_KEY_ID and
AWS_SECRET_ACCESS_KEY environment variables to specify
the authentication keys for your AWS account.
When running projects from within Xcode, the environment you have set up for your shell is not automatically inherited. Because of this, if you want to test your code using your AWS account’s access key ID and secret access key, you need to set up the runtime environment for your application in the Xcode scheme for your development device. To configure the environment for a particular target in your Xcode project, switch to that target, then choose Edit Scheme in Xcode’s Product menu.
This will open the scheme editor window for your project. Click on the Run phase in the left sidebar, then Arguments in the tab bar near the top of the window.

Under Environment Variables, click the +
icon to add AWS_REGION and set its value to the desired region (in the
screenshot above, it’s set to "us-east-2"). Then add AWS_ACCESS_KEY_ID and
its value, then AWS_SECRET_ACCESS_KEY and its value. If you're using
temporary credentials (which is recommended), also add the
AWS_SESSION_TOKEN variable and its value. Close the window once you have
these configured and your scheme’s Run configuration looks similar to the above.
Important
Be sure to uncheck the Shared checkbox before pushing your code to any public version control repository such as GitHub. Otherwise, your AWS access key and secret access key will be included in the publicly shared content. This is important enough to be worth double-checking regularly.
Your project should now be able to use the SDK to connect to AWS services.
Building and running a SwiftPM project
To build and run a Swift Package Manager project from a Linux or macOS terminal prompt, use the following commands.
Build a project
$swift build
Run a project
$swift run$swift runexecutable-name$swift runexecutable-namearg1, ...
If your project builds only one executable file, you can type swift run to build and run it. If your project outputs multiple executables, you can specify the file name of the executable you want to run. If you want to pass arguments to the program when you run it, you must specify the executable name before listing the arguments.
Get the built product output directory
$swift build --show-bin-path /home/janice/MyProject/.build/x86_64-unknown-linux-gnu/debug
Delete build artifacts
$swift package clean
Delete build artifacts and all build caches
$swift package reset
Importing AWS SDK for Swift libraries into source files
After the libraries are in place, you can use the Swift import directive to
import the individual libraries into each source file that needs them. To use the functions
for a given service, import its library from the AWS SDK for Swift package into your source code
file. Also import the ClientRuntime library, which contains utility
functions and type definitions.
import Foundation
import ClientRuntime
import AWSS3
The standard Swift library Foundation is also imported because it's
used by many features of the AWS SDK for Swift.
Next steps
Now that your tools and environment are ready for you to begin developing with AWS SDK for Swift, see Getting started with the AWS SDK for Swift, which demonstrates how to create and build a Swift project using AWS services.
