The create new environment wizard
This topic describes the Create environment wizard and all the ways you can use it to configure the environment you want to create.
Note
In Creating an Elastic Beanstalk environment we show how to launch the Create environment wizard and quickly create an environment with default values and recommended settings. This current topic will walk you through all of the options.
Wizard page
The Create environment wizard provides a set of steps for you to create a new environment.

Environment tier
For environment tier, choose the Web server environment or Worker environment environment tier. You can't change an environment's tier after creation.
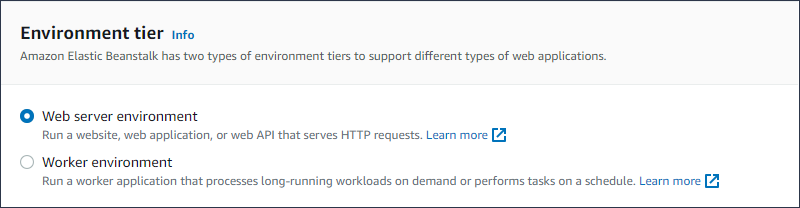
Note
The .NET on Windows Server platform doesn't support the worker environment tier.
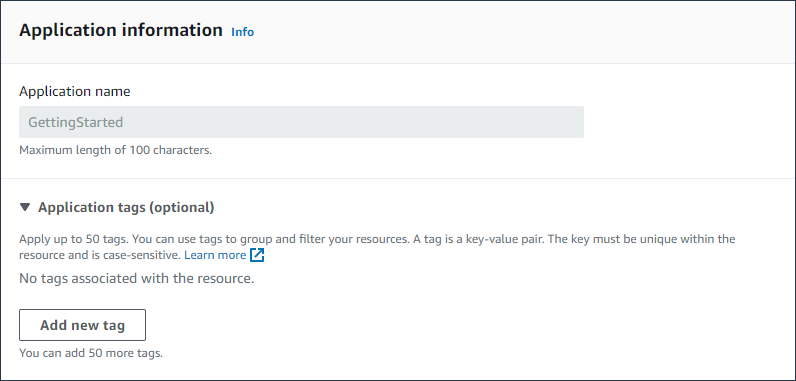
Application information
If you launched the wizard by selecting Create new environment from the Application overview page, then the Application name is prefilled. Otherwise, enter an application name. Optionally, add application tags.
Environment information
Set the environment's name and domain, and create a description for your environment. Be aware that these environment settings cannot change after the environment is created.

-
Name – Enter a name for the environment. The form provides a generated name.
-
Domain – (web server environments) Enter a unique domain name for your environment. The default name is the environment's name. You can enter a different domain name. Elastic Beanstalk uses this name to create a unique CNAME for the environment. To check whether the domain name you want is available, choose Check Availability.
-
Description – Enter a description for this environment.
Select a platform for the new environment
You can create a new environment from two types of platforms:
-
Managed platform
-
Custom platform
Managed platform
In most cases you use an Elastic Beanstalk managed platform for your new environment. When the new environment wizard starts, it selects the Managed platform option by default.

Select a platform, a platform branch within that platform, and a specific platform version in the branch. When you select a platform branch, the recommended version within the branch is selected by default. In addition, you can select any platform version you've used before.
Note
For a production environment, we recommend that you choose a platform version in a supported platform branch. For details about platform branch states, see the Platform Branch definition in the Elastic Beanstalk platforms glossary.
Custom platform
If an off-the-shelf platform doesn't meet your needs, you can create a new environment from a custom platform. To specify a custom platform, choose the Custom platform option, and then select one of the available custom platforms. If there are no custom platforms available, this option is dimmed.
Provide application code
Now that you have selected the platform to use, the next step is to provide your application code.
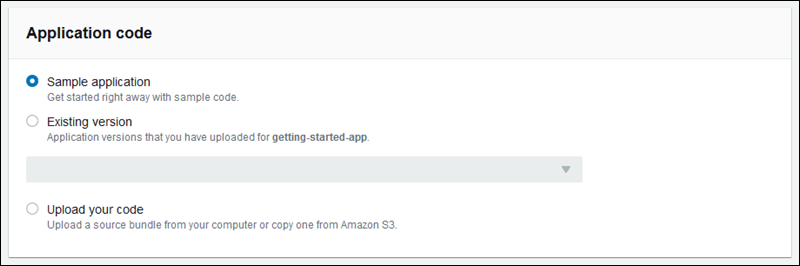
You have several options:
-
You can use the sample application that Elastic Beanstalk provides for each platform.
-
You can use code that you already deployed to Elastic Beanstalk. Choose Existing version and your application in the Application code section.
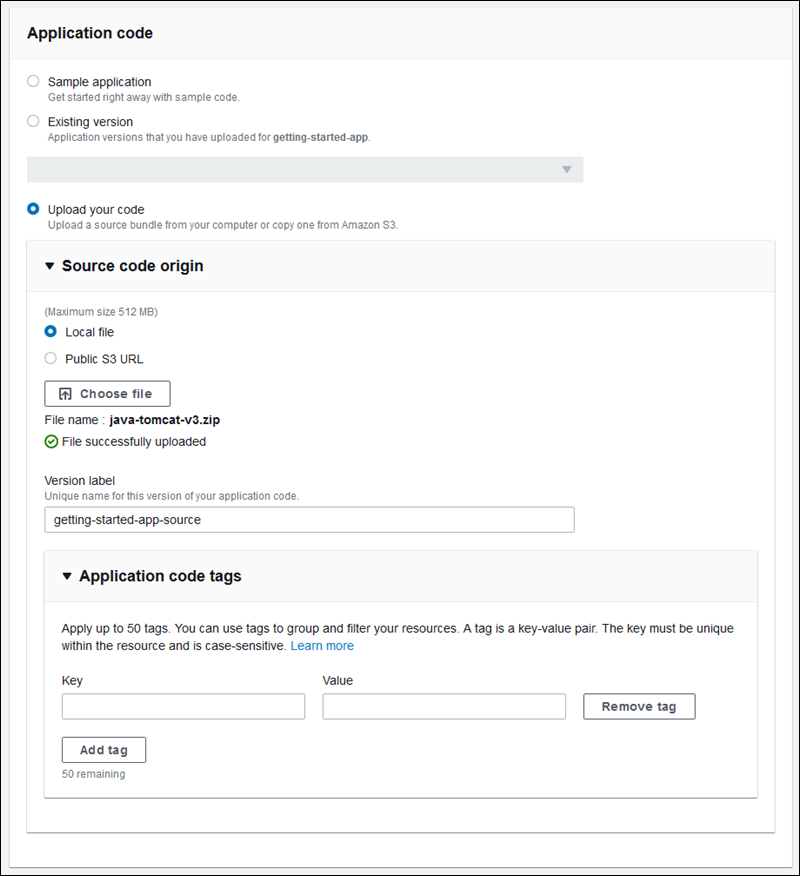
-
You can upload new code. Choose Upload your code, and then choose Upload. You can upload new application code from a local file, or you can specify the URL for the Amazon S3 bucket that contains your application code.
Note
Depending on the platform version you selected, you can upload your application in a ZIP source bundle, a WAR file, or a plaintext Docker configuration. The file size limit is 500 MB.
When you choose to upload new code, you can also provide tags to associate with your new code. For more information about tagging an application version, see Tagging application versions.
For quick environment creation using default configuration options, you can now choose Create environment. Choose Configure more options to make additional configuration changes, as described in the following sections.
Wizard configuration page
When you choose Configure more options, the wizard shows the Configure page. On this page you can select a configuration preset, change the platform version you want your environment to use, or make specific configuration choices for the new environment.
Choose a preset configuration
On the Presets section of the page, Elastic Beanstalk provides several configuration presets for different use cases. Each preset includes recommended values for several configuration options.
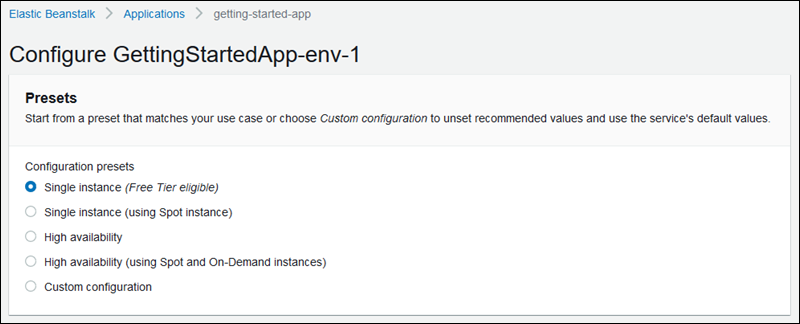
The High availability presets include a load balancer, and are recommended for production environments. Choose them if you want an environment that can run multiple instances for high availability and scale in response to load. The Single instance presets are primarily recommended for development. Two of the presets enable Spot Instance requests. For details about Elastic Beanstalk capacity configuration, see Auto Scaling group.
The last preset, Custom configuration, removes all recommended values except role settings and uses the API defaults. Choose this option if you are deploying a source bundle with configuration files that set configuration options. Custom configuration is also selected automatically if you modify either the Low cost or High availability configuration presets.
Customize your configuration
In addition to (or instead of) choosing a configuration preset, you can fine-tune configuration options in your environment. The Configure wizard wizard shows several configuration categories. Each configuration category displays a summary of values for a group of configuration settings. Choose Edit to edit this group of settings.
Configuration Categories
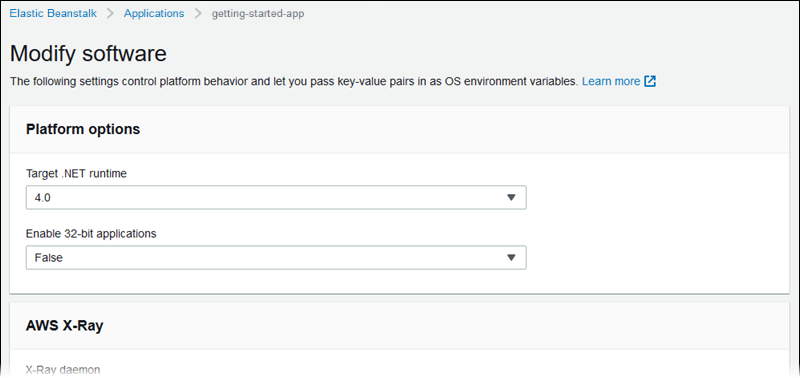
Software settings
Use the Modify software configuration page to configure the software on the Amazon Elastic Compute Cloud (Amazon EC2) instances that run your application. You can configure environment properties, AWS X-Ray debugging, instance log storing and streaming, and platform-specific settings. For details, see Environment variables and other software settings.
Instances
Use the Modify instances configuration page to configure the Amazon EC2 instances that run your application. For details, see The Amazon EC2 instances for your Elastic Beanstalk environment.

Capacity
Use the Modify capacity configuration page to configure the compute capacity of your environment and Auto Scaling group settings to optimize the number and type of instances you're using. You can also change your environment capacity based on triggers or on a schedule.
A load-balanced environment can run multiple instances for high availability and prevent downtime during configuration updates and deployments. In a load-balanced environment, the domain name maps to the load balancer. In a single-instance environment, it maps to an elastic IP address on the instance.
Warning
A single-instance environment isn't production ready. If the instance becomes unstable during deployment, or Elastic Beanstalk terminates and restarts the instance during a configuration update, your application can be unavailable for a period of time. Use single-instance environments for development, testing, or staging. Use load-balanced environments for production.
For more information about environment capacity settings, see Auto Scaling your Elastic Beanstalk environment instances and The Amazon EC2 instances for your Elastic Beanstalk environment.

Load balancer
Use the Modify load balancer configuration page to select a load balancer type and to configure settings for it. In a load-balanced environment, your environment's load balancer is the entry point for all traffic headed for your application. Elastic Beanstalk supports several types of load balancer. By default, the Elastic Beanstalk console creates an Application Load Balancer and configures it to serve HTTP traffic on port 80.
Note
You can only select your environment's load balancer type during environment creation.
For more information about load balancer types and settings, see Load balancer for your Elastic Beanstalk environment and Configuring HTTPS for your Elastic Beanstalk environment.
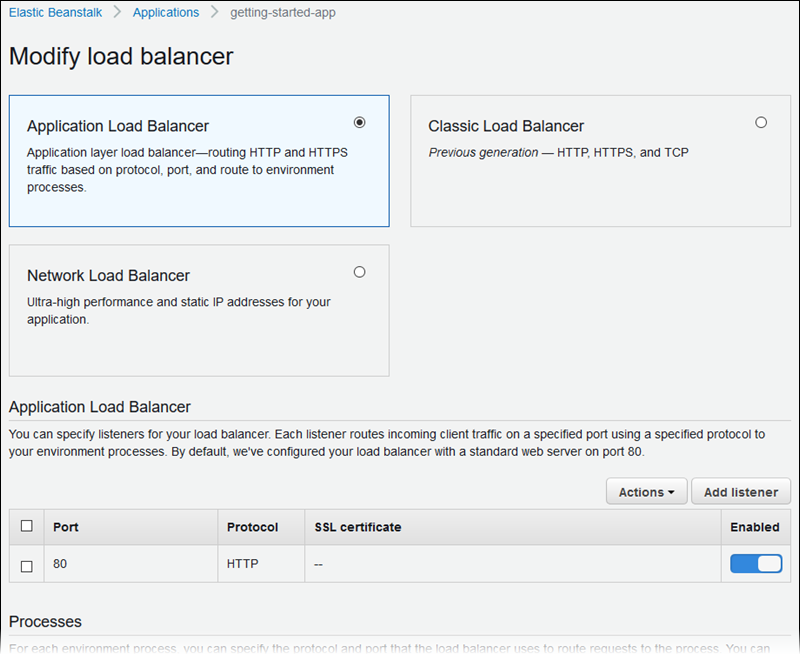
Note
The Classic Load Balancer (CLB) option is disabled on the Create Environment console wizard. If you have an existing environment configured with a Classic Load Balancer you can create a new one by cloning the existing environment using either the Elastic Beanstalk console or the EB CLI. You also have the option to use the EB CLI or the AWS CLI to create a new environment configured with a Classic Load Balancer. These command line tools will create a new environment with a CLB even if one doesn’t already exist in your account.
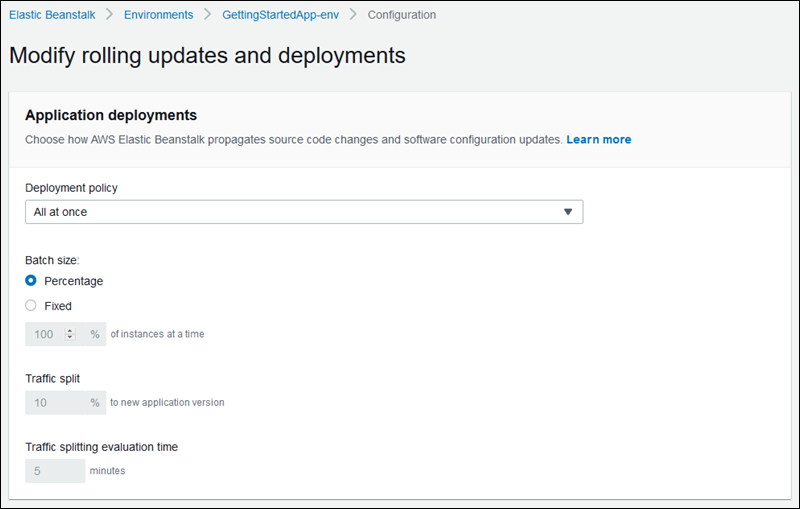
Rolling updates and deployments
Use the Modify rolling updates and deployments configuration page to configure how Elastic Beanstalk processes application deployments and configuration updates for your environment.
Application deployments happen when you upload an updated application source bundle and deploy it to your environment. For more information about configuring deployments, see Deployment policies and settings.
Configuration changes that modify the launch configuration or VPC settings require terminating all instances in your environment and replacing them. For more information about setting the update type and other options, see Configuration changes.

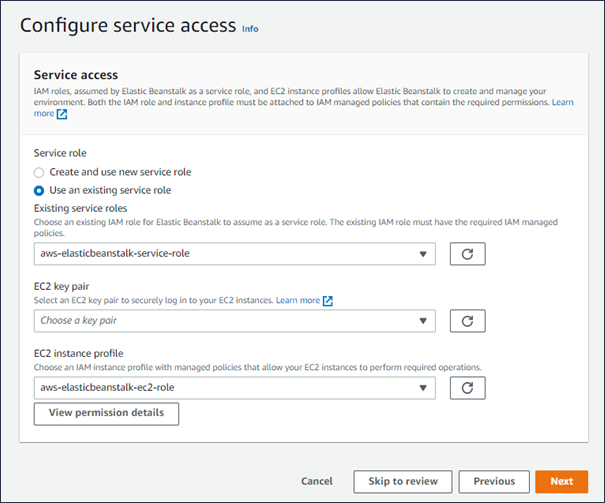
Security
Use the Configure service access page to configure service and instance security settings.
For a description of Elastic Beanstalk security concepts, see Elastic Beanstalk Service roles, instance profiles, and user policies.
The first time you create an environment in the Elastic Beanstalk console, you must create an EC2 instance profile with a default set of permissions. If the EC2 instance profile dropdown list doesn't show any values to choose from, expand the procedure that follows. It provides steps to create a Role that you can subsequently select for the EC2 instance profile.
To create or select an EC2 instance profile
-
If you have previously created an EC2 instance profile and would like to choose an existing one, select the value from the EC2 instance profile drop-down and skip the remainder of these steps to create an EC2 instance profile.
-
If you don't see any values listed for EC2 instance profile, or you'd like to create a new one, continue with the next steps.
-
Choose Create role.
-
For Trusted entity type, choose AWS service.
-
For Use case, choose Elastic Beanstalk – Compute.
-
Choose Next.
-
Verify that Permissions policies include the following, then choose Next:
AWSElasticBeanstalkWebTierAWSElasticBeanstalkWorkerTierAWSElasticBeanstalkMulticontainerDocker
Choose Create role.
-
Return to the Configure service access tab, refresh the list, then select the newly created EC2 instance profile.
Monitoring
Use the Modify monitoring configuration page to configure health reporting, monitoring rules, and health event streaming. For details, see Enabling Elastic Beanstalk enhanced health reporting, Configuring enhanced health rules for an environment, and Streaming Elastic Beanstalk environment health information to Amazon CloudWatch Logs.

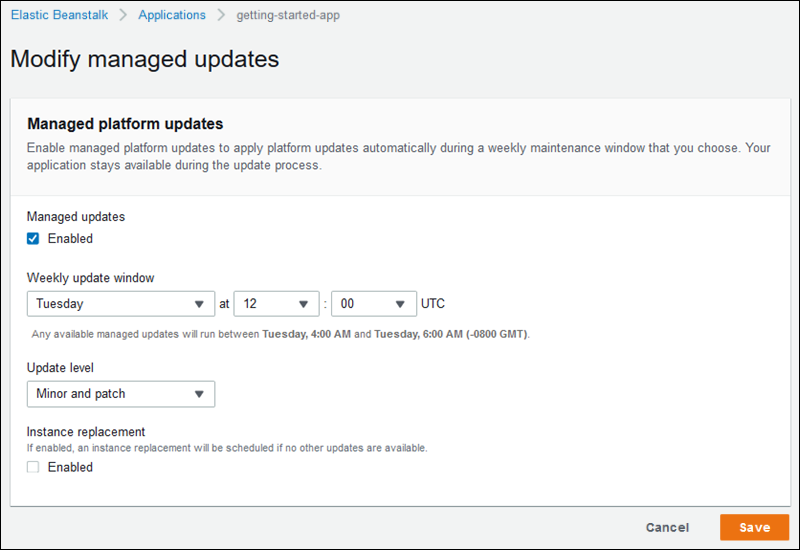
Managed updates
Use the Modify managed updates configuration page to configure managed platform updates. You can decide if you want them enabled, set the schedule, and configure other properties. For details, see Managed platform updates.
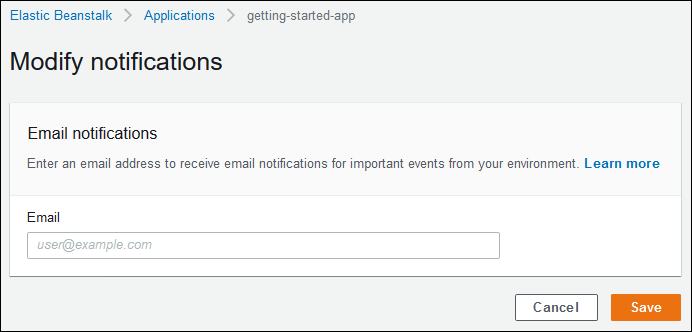
Notifications
Use the Modify notifications configuration page to specify an email address to receive email notifications for important events from your environment.
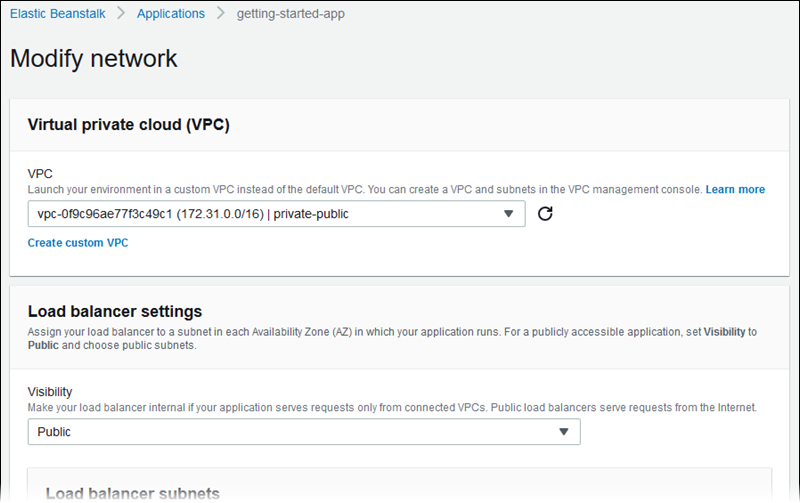
Network
If you have created a custom VPC, the Modify network configuration page to configure your environment to use it. If you don't choose a VPC, Elastic Beanstalk uses the default VPC and subnets.
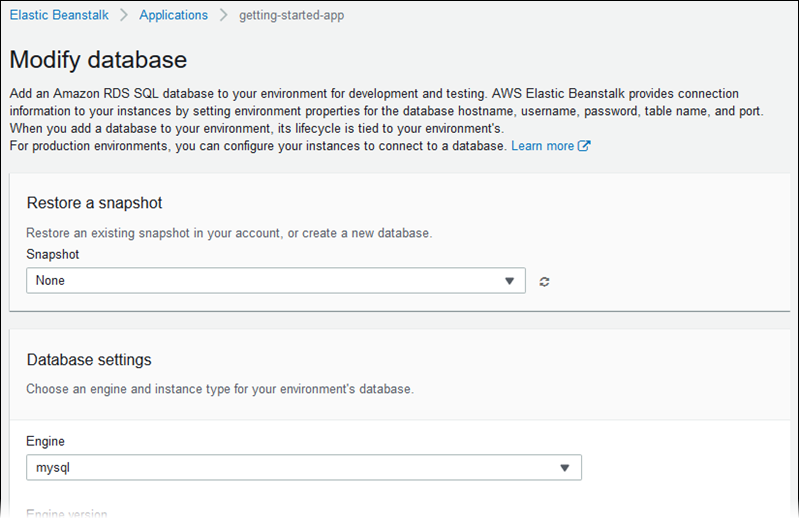
Database
Use the Modify database configuration page to add an Amazon Relational Database Service (Amazon RDS) database to your environment for development and testing. Elastic Beanstalk provides connection information to your instances by setting environment properties for the database hostname, user name, password, table name, and port.
For details, see Adding a database to your Elastic Beanstalk environment.
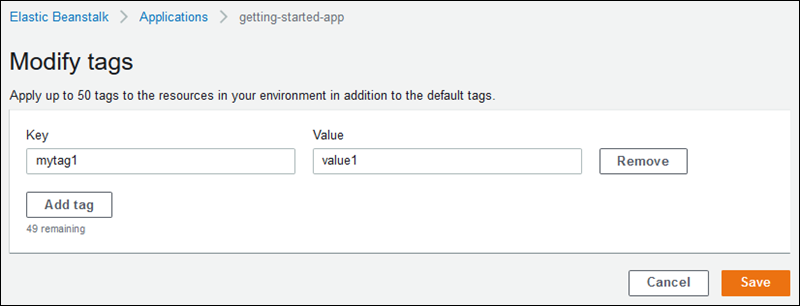
Tags
Use the Modify tags configuration page to add tags to the resources in your environment. For more information about environment tagging, see Tagging resources in your Elastic Beanstalk environments.
Worker environment
If you're creating a worker tier environment, use the Modify worker configuration page to configure the worker environment. The worker daemon on the instances in your environment pulls items from an Amazon Simple Queue Service (Amazon SQS) queue and relays them as post messages to your worker application. You can choose the Amazon SQS queue that the worker daemon reads from (auto-generated or existing). You can also configure the messages that the worker daemon sends to your application.
For more information, see Elastic Beanstalk worker environments.

