FSx for ONTAP supports the iSCSI protocol. You need to provision iSCSI on both the Windows client and the SVM and volume in order to use the iSCSI protocol to transport data between clients and your file system. The iSCSI protocol is available on all file systems that have 6 or fewer high-availability (HA) pairs.
The examples presented in these procedures show how to provision the iSCSI protocol on the client and FSx for ONTAP file system, and use the following set up:
The iSCSI LUN that is getting mounted to a Windows host is already created. For more information, see Creating an iSCSI LUN.
The Microsoft Windows host that is mounting the iSCSI LUN is an Amazon EC2 instance running a Microsoft Windows Server 2019 Amazon Machine Image (AMI). It has VPC security groups configured to allow inbound and outbound traffic as described in File System Access Control with Amazon VPC.
You may be using a different Microsoft Windows AMI in your set up.
The client and the file system are located in the same VPC and AWS account. If the client is located in another VPC, you can use VPC peering or AWS Transit Gateway to grant other VPCs access to the iSCSI endpoints. For more information, see Accessing data from outside the deployment VPC.
We recommend that the EC2 instance be in the same availability zone as your file system's preferred subnet, as shown in the following graphic.

Topics
Configure iSCSI on the Windows client
-
Use Windows Remote Desktop to connect to the Windows client on which you want to mount the iSCSI LUN. For more information, see Connect to your Windows instance using RDP in the Amazon Elastic Compute Cloud User Guide.
-
Open a Windows PowerShell as an Administrator. Use the following commands to enable iSCSI on your Windows instance and configure the iSCSI service to start automatically.
PS C:\>Start-Service MSiSCSIPS C:\>Set-Service -Name msiscsi -StartupType Automatic -
Retrieve the initiator name of your Windows instance. You’ll use this value in configuring iSCSI on your FSx for ONTAP file system using the NetApp ONTAP CLI.
PS C:\>(Get-InitiatorPort).NodeAddressThe system responds with the initiator port:
iqn.1991-05.com.microsoft:ec2amaz-abc123d -
To enable your clients to automatically failover between your file servers, you need install
Multipath-IO(MPIO) on your Windows instance. Use the following command:PS C:\>Install-WindowsFeature Multipath-IO -
Restart your Windows instance after the
Multipath-IOinstallation has completed. Keep your Windows instance open to perform steps for mounting the iSCSI LUN in a section that follows.
Configure iSCSI on the FSx for ONTAP file system
To access the ONTAP CLI, establish an SSH session on the management port of the Amazon FSx for NetApp ONTAP file system or SVM by running the following command. Replace
management_endpoint_ip[~]$ssh fsxadmin@management_endpoint_ipFor more information, see Managing file systems with the ONTAP CLI.
-
Using the ONTAP CLI lun igroup create
, create the initiator group, or igroup. An initiator group maps to iSCSI LUNs and controls which initiators (clients) have access to LUNs. Replacehost_initiator_namewith the initiator name from your Windows host that you retrieved in the previous procedure.::>lun igroup create -vserversvm_name-igroupigroup_name-initiatorhost_initiator_name-protocol iscsi -ostype windowsIo make the LUNs mapped to this
igroupavailable to multiple hosts, you can specify multiple comma-separated initiator names usinglun igroup createONTAP CLI command. -
Confirm that the
igroupwas created successfully using the lun igroup showONTAP CLI command: ::>lun igroup showThe system responds with the following output:
Vserver Igroup Protocol OS Type Initiators --------- ------------ -------- -------- ------------------------------------svm_nameigroup_nameiscsi windows iqn.1994-05.com.windows:abcdef12345With the
igroupcreated, you are ready to create LUNs and map them to theigroup. -
This step assumes that you have already created an iSCSI LUN. If you have not, see Creating an iSCSI LUN for step-by-step instructions to do so.
Create a LUN mapping from the LUN to your new
igroup.::>lun mapping create -vserversvm_name-path /vol/vol_name/lun_name-igroupigroup_name-lun-idlun_id -
Confirm that the LUN is created, online, and mapped with the following command:
::>lun show -path /vol/vol_name/lun_nameVserver Path State Mapped Type Size --------- ------------------------------- ------- -------- -------- --------svm_name/vol/vol_name/lun_nameonline mapped windows 10GBYou are now ready to add the iSCSI target on your Windows instance.
-
Retrieve the IP addresses of the
iscsi_1andiscsi_2interfaces for your SVM using the following command:::>network interface show -vserversvm_nameLogical Status Network Current Current Is Vserver Interface Admin/Oper Address/Mask Node Port Home ----------- ---------- ---------- ------------------ ------------- ------- ----svm_nameiscsi_1 up/up 172.31.0.143/20 FSxId0123456789abcdef8-01 e0e true iscsi_2 up/up 172.31.21.81/20 FSxId0123456789abcdef8-02 e0e true nfs_smb_management_1 up/up 198.19.250.177/20 FSxId0123456789abcdef8-01 e0e true 3 entries were displayed.In this example, the IP address of
iscsi_1is172.31.0.143andiscsi_2is172.31.21.81.
Mount an iSCSI LUN on the Windows client
On your Windows instance, open a PowerShell terminal as an Administrator.
You will create a
.ps1script that does the following:Connects to each of your file system’s iSCSI interfaces.
Adds and configures MPIO for iSCSI.
-
Establishes 8 sessions for each iSCSI connection, which enables the client to drive up to 40 Gbps (5,000 MBps) of aggregate throughput to the iSCSI LUN. Having 8 sessions ensures a single client can drive the full 4,000 MBps throughput capacity for the highest-level FSx for ONTAP throughput capacity. You can optionally change the number of sessions to a higher or lower number of sessions (each session provides up to 625 MBps of throughput) by modifying the script's for-loop in the
#Establish iSCSI
                                    connection
step from1..8to another upper-bound. For more information, see Amazon EC2 instance network bandwidth in the Amazon Elastic Compute Cloud User Guide for Windows Instances.
Copy the following set of commands into a file to create the
.pslscript.Replace
iscsi_1andiscsi_2with the IP addresses you retrieved in the previous step.Replace
ec2_ipwith the IP address of your Windows instance.
#iSCSI IP addresses for Preferred and Standby subnets $TargetPortalAddresses = @("iscsi_1","iscsi_2") #iSCSI Initator IP Address (Local node IP address) $LocaliSCSIAddress = "ec2_ip" #Connect to FSx for NetApp ONTAP file system Foreach ($TargetPortalAddress in $TargetPortalAddresses) { New-IscsiTargetPortal -TargetPortalAddress $TargetPortalAddress -TargetPortalPortNumber 3260 -InitiatorPortalAddress $LocaliSCSIAddress } #Add MPIO support for iSCSI New-MSDSMSupportedHW -VendorId MSFT2005 -ProductId iSCSIBusType_0x9 #Set the MPIO path configuration for new servers to ensure that MPIO is properly configured and visible in the disk properities. Set-MPIOSetting -NewPathVerificationState Enabled #Establish iSCSI connection 1..8 | %{Foreach($TargetPortalAddress in $TargetPortalAddresses) {Get-IscsiTarget | Connect-IscsiTarget -IsMultipathEnabled $true -TargetPortalAddress $TargetPortalAddress -InitiatorPortalAddress $LocaliSCSIAddress -IsPersistent $true}} #Set the MPIO Policy to Round Robin Set-MSDSMGlobalDefaultLoadBalancePolicy -Policy RR-
Launch the Windows Disk Management application. Open the Windows Run dialog box, and enter
diskmgmt.mscand press Enter. The Disk Management application opens.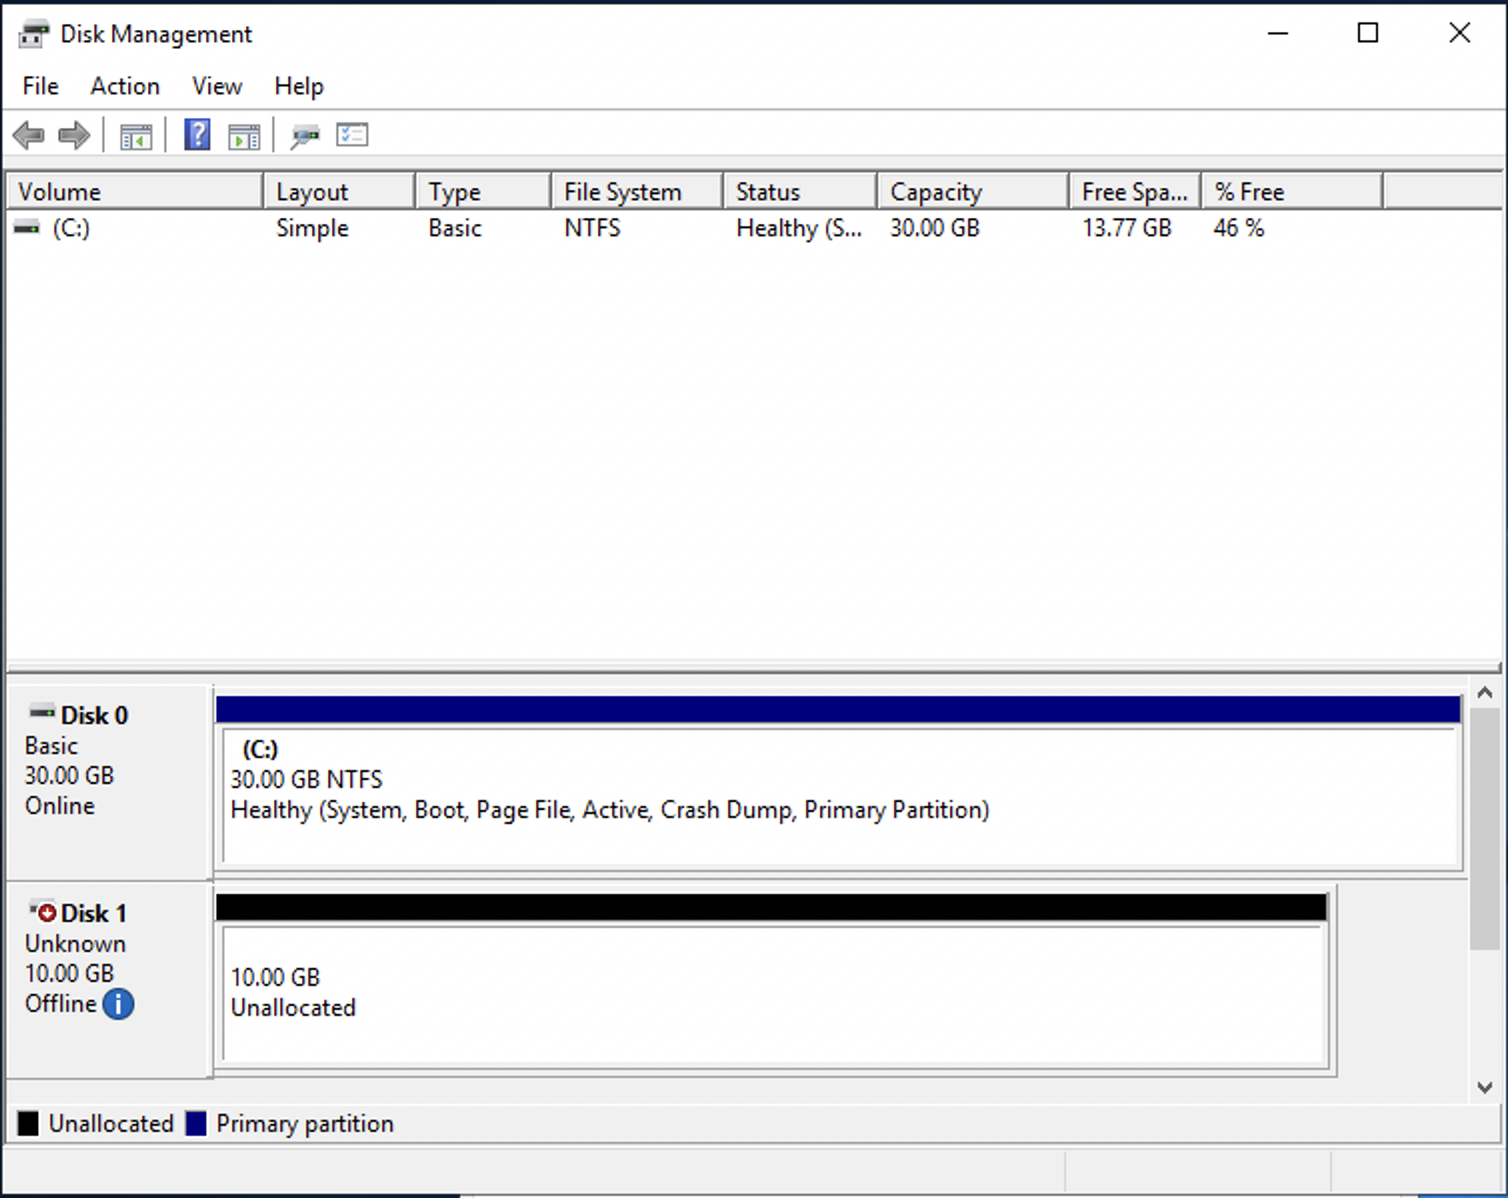
Locate the unallocated disk This is the iSCSI LUN. In the example, Disk 1 is the iSCSI disk. It is offline.

Bring the volume online by placing the cursor over Disk 1 and right-click then choose Online.
Note
You can modify the storage area network (SAN) policy so that new volumes are automatically brought online. For more information, see SAN policies
in the Microsoft Windows Server Command Reference. -
To initialize the disk, place the cursor over Disk 1 right-click, and choose Initialize. The Initialize dialog appears. Choose OK initialize the disk.
-
Format the disk as you would normally. After formatting is complete, the iSCSI drive appears as a usable drive on the Windows client.
Validating your iSCSI
configuration
We have provided a script to check that your iSCSI setup is properly configured. The script examines parameters such as session count, node distribution, and Multipath I/O (MPIO) status. The following task explains how to install and use the script.
To validate your iSCSI configuration
-
Open a Windows PowerShell window.
-
Download the script using the following command.
PS C:\>Invoke-WebRequest "https://docs.aws.amazon.com/fsx/latest/ONTAPGuide/samples/CheckiSCSI.zip" -OutFile "CheckiSCSI.zip" -
Expand the zip file using the following command.
PS C:\>Expand-Archive -Path ".\CheckiSCSI.zip" -DestinationPath "./" -
Run the script using the following command.
PS C:\>./CheckiSCSI.ps1 -
Review the output to understand your configuration's current state. The following example demonstrates a successful iSCSI configuration.
PS C:\>./CheckiSCSI.ps1This script checks the iSCSI configuration on the local instance. It will provide information about the number of connected sessions, connected file servers, and MPIO status. MPIO is installed on this server. MPIO Load Balance Policy is set to Round Robin (RR). Initiator: 'iqn.1991-05.com.microsoft:ec2amaz-d2cebnb' to Target: 'iqn.1992-08.com.netapp:sn.13266b10e61411ee8bc0c76ad263d613:vs.3' has 16 total sessions (16 active, 0 non-active) spread across 2 node(s). MPIO: Yes
