Creating a federated catalog using an AWS Glue connection
To connect the AWS Glue Data Catalog to external data sources, you need to use AWS Glue connections that enable communication with the external data sources. You can create AWS Glue connections using the AWS Glue console, Create connection API, and Amazon SageMaker Lakehouse console.
For step by step instructions for creating an AWS Glue connection, see Connecting to data in the AWS Glue Developer Guide or Creating connections in Amazon SageMaker Lakehouse.
When a user runs a query on federated tables, Lake Formation vends credentials that invoke an AWS Lambda function specified in the AWS Glue connection to retrieve metadata objects from the data source.
- AWS Management Console
-
To create a federated catalog from an external data source and set up permissions (console)
-
Open the Lake Formation console at https://console.aws.amazon.com/lakeformation/
. In the navigation pane, choose Catalogs under Data Catalog.
Select the option Create catalog.
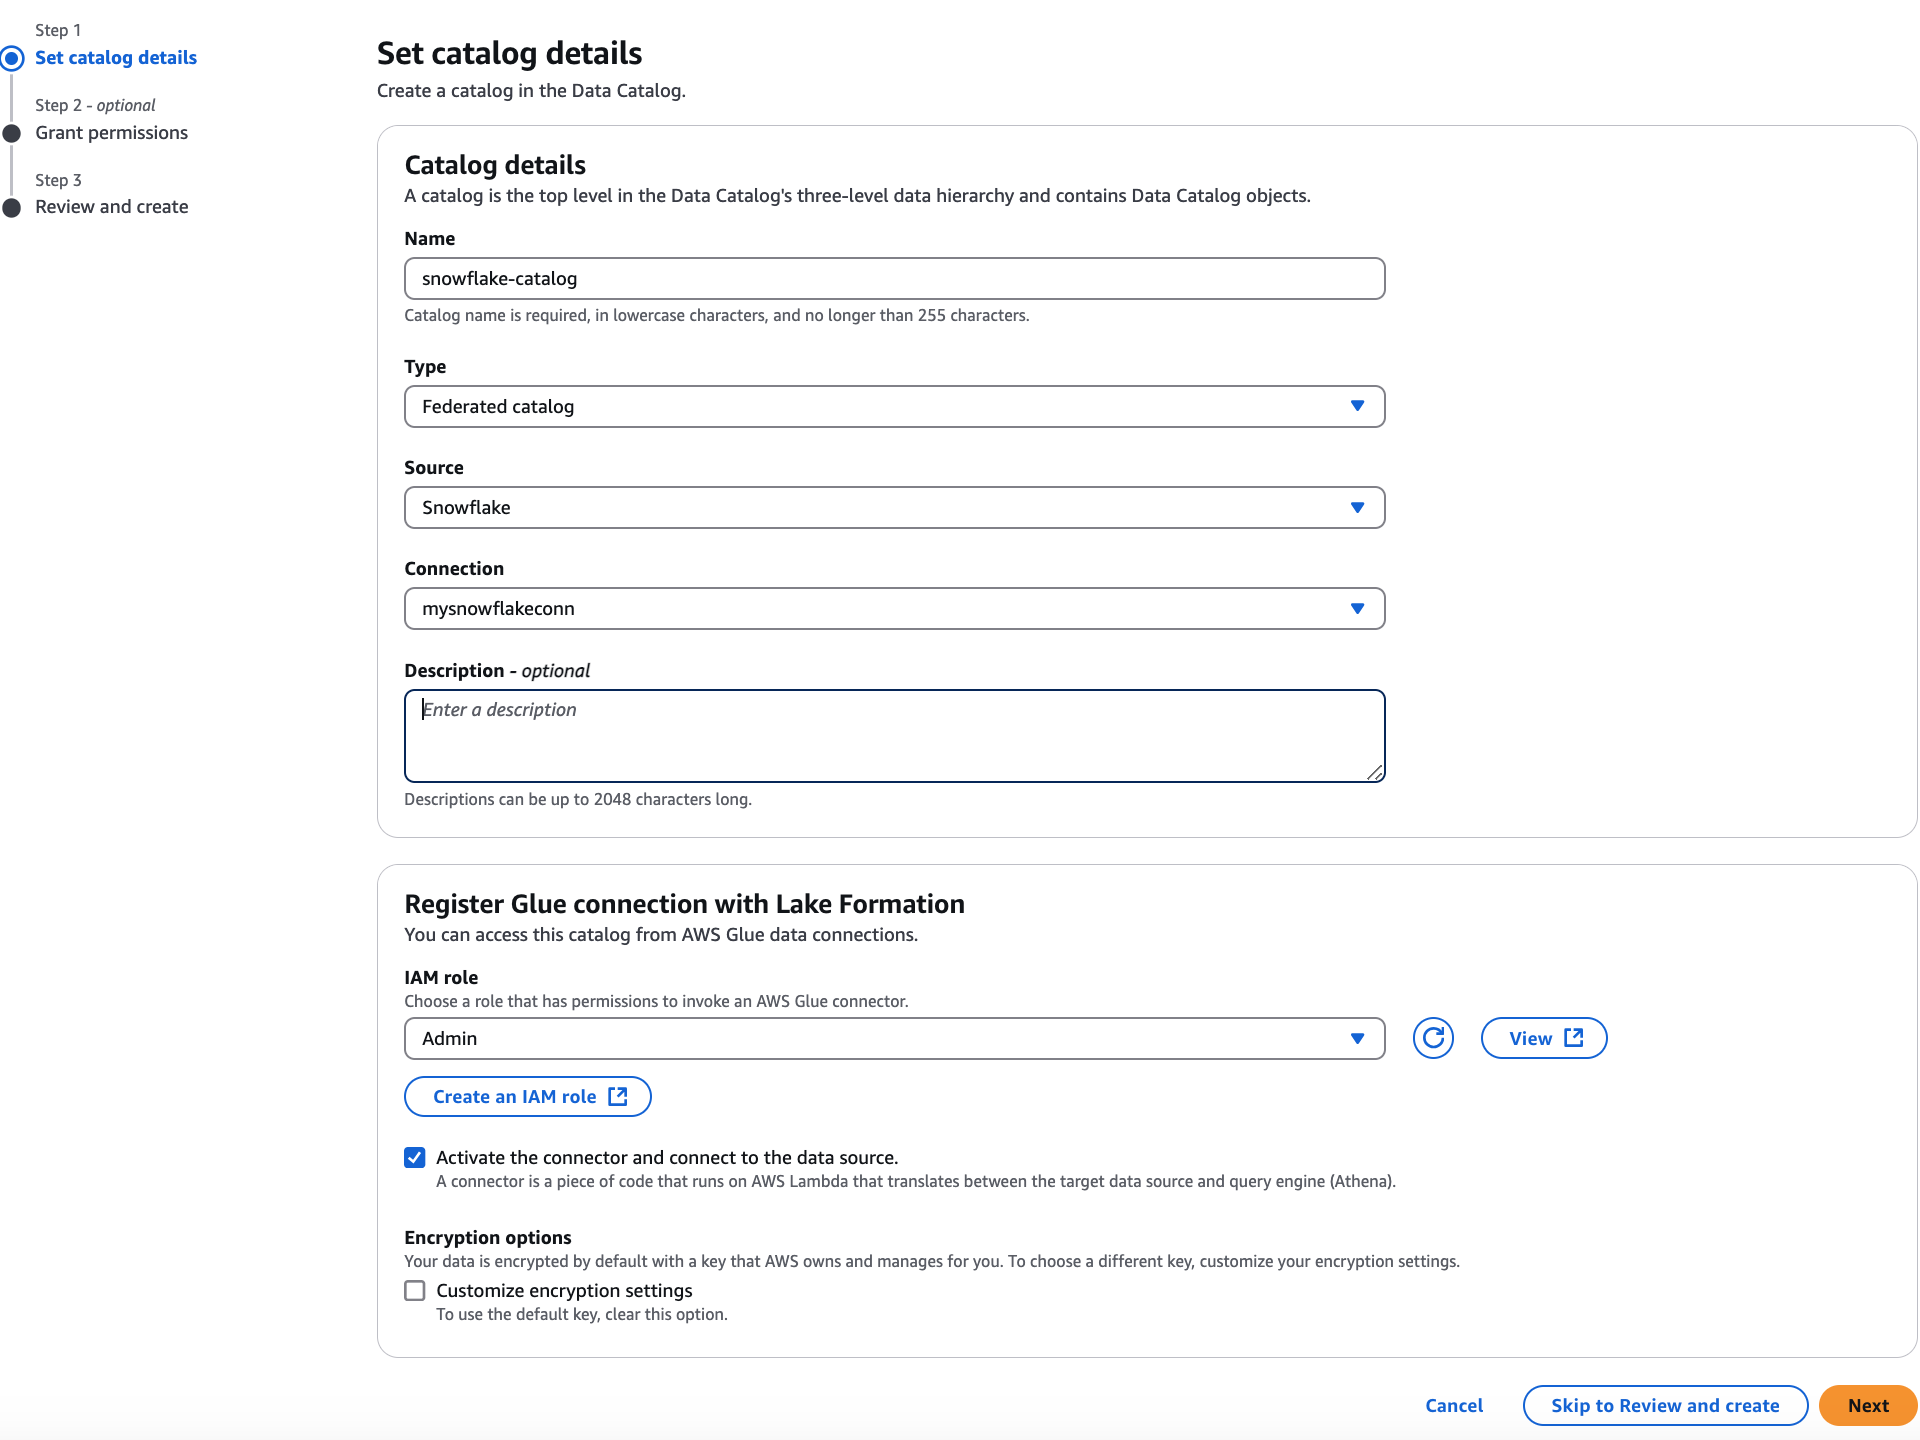
On the Set Catalog details page, enter the following information:
-
Name – A unique name for your federated catalog. The name can't be changed, and must be in lower case. The name can consist of a maximum of 255 characters maximum. account.
-
Type – Choose federated catalog as the catalog type.
-
Source – Choose a data source from the dropdown. The data sources for which you've created connections are displayed. For more information about creating an AWS Glue connection to an external data source, see Creating connections for connectors in the AWS Glue Developer Guide or Creating connections in Amazon SageMaker Lakehouse.
-
Connection – Choose an existing AWS Glue connection to the data source.
-
Description – Enter a description for the catalog created from the data source.
-
-
Choose an IAM role for Lake Formation to assume to vend credentials for the querying engine to access data from the data source. This role must have the required permissions to access the AWS Glue connection and invoke the Lambda function to access data from the external data source.
You can also Create a new role in the IAM console.
See the Prerequisites for connecting the Data Catalog to external data sources section for the required permissions.
-
Select the option Activate the connector to connect to the data source to enable Athena to run federated queries.
For the supported list of connectors, see Register your connection in the Amazon Athena User Guide.
-
Encryption options – Choose Customize encryption settings option if you want to use a custom key to encrypt the catalog. To use a custom key, you must add additional custom managed key policy to your KMS key.
Choose Next to grant permissions to other principals.
On the Grant permissions page, choose Add permissions.
-
On the Add permissions screen, choose the principals and the types of permissions to grant.

-
In the Principals section, choose a principal type and then specify principals to grant permissions.
-
IAM users and roles – Choose one or more users or roles from the IAM users and roles list.
-
SAML users and groups – For SAML and Amazon QuickSight users and groups, enter one or more Amazon Resource Names (ARNs) for users or groups federated through SAML, or ARNs for Amazon QuickSight users or groups. Press Enter after each ARN.
-
-
In the Permissions section, select permissions and grantable permissions.
Under Catalog permissions, select one or more permissions to grant.
Choose Super user to grant unrestricted administrative permissions on all resources within the catalog.
Under Grantable permissions, select the permissions that the grant recipient can grant to other principals in their AWS account. This option is not supported when you are granting permissions to an IAM principal from an external account.
-
-
Choose Next to review the information and create the catalog. The Catalogs list shows the new federated catalog.
The Data locations list shows the newly registered federated connection.

-
- AWS CLI
-
To create a federated catalog from an external data source and set up permissions
-
The following example shows how to create an AWS Glue connection.
aws glue create-connection --connection-input \ '{ "Name":"DynamoDB connection", "ConnectionType":"DYNAMODB", "Description":"A connection created for DynamoDB", "ConnectionProperties": {}, "AthenaProperties": "spill_prefix":"your_spill_prefix", "lambda_function_arn":"Lambda_function_arn", "spill_bucket":"Your_Bucket_name", "AuthenticationConfiguration": {} }' -
The following example shows how to register an AWS Glue connection with Lake Formation.
aws lakeformation register-resource --cli-input-json \ {"ResourceArn":"arn:aws:glue:us-east-1:123456789012:connection/dynamo","RoleArn":"arn:aws:iam::123456789012:role/AdminTelemetry","WithFederation":true} -
The following example shows how to create a federated catalog.
aws glue create-catalog
 --cli-input-json \
      '{
       "Name":"ddbcatalog",
       "CatalogInput":{"CatalogProperties":{"DataLakeAccessProperties":{"DataTransferRole":"arn:aws:iam::123456789012:role/role name"}},
       "CreateDatabaseDefaultPermissions":[],
       "CreateTableDefaultPermissions":[],
       "FederatedCatalog":{"ConnectionName":"dynamo","Identifier":"dynamo"}
         }
       }'
-
