Create a workflow
You can create a managed workflow by using the AWS Management Console, as described in this topic. To make the workflow creation process as easy as possible, contextual help panels are available for most of the sections in the console.
A workflow has two kinds of steps:
-
Nominal steps – Nominal steps are file-processing steps that you want to apply to incoming files. If you select more than one nominal step, each step is processed in a linear sequence.
-
Exception-handling steps – Exception handlers are file-processing steps that AWS Transfer Family executes in case any nominal steps fail or result in validation errors.
Create a workflow
-
Open the AWS Transfer Family console at https://console.aws.amazon.com/transfer/
. -
In the left navigation pane, choose Workflows.
-
On the Workflows page, choose Create workflow.
-
On the Create workflow page, enter a description. This description appears on the Workflows page.
-
In the Nominal steps section, choose Add step. Add one or more steps.
-
Choose a step type from the available options. For more information about the various step types, see Use predefined steps.
-
Choose Next, then configure parameters for the step.
-
Choose Next, then review the details for the step.
-
Choose Create step to add the step and continue.
-
Continue adding steps as needed. The maximum number of steps in a workflow is 8.
-
After you have added all of the necessary nominal steps, scroll down to the Exception handlers – optional section, and choose Add step.
Note
So that you are informed of failures in real time, we recommend that you set up exception handlers and steps to execute when your workflow fails.
-
-
To configure exception handlers, add steps in the same manner as described previously. If a file causes any step to throw an exception, your exception handlers are invoked one by one.
-
(Optional) Scroll down to the Tags section, and add tags for your workflow.
-
Review the configuration, and choose Create workflow.
Important
After you've created a workflow, you can't edit it, so make sure to review the configuration carefully.
Configure and run a workflow
Before you can run a workflow, you need to associate it with a Transfer Family server.
To configure Transfer Family to run a workflow on uploaded files
-
Open the AWS Transfer Family console at https://console.aws.amazon.com/transfer/
. -
In the left navigation pane, choose Servers.
-
To add the workflow to an existing server, choose the server that you want to use for your workflow.
-
Alternatively, create a new server and add the workflow to it. For more information, see Configuring an SFTP, FTPS, or FTP server endpoint.
-
-
On the details page for the server, scroll down to the Additional details section, and then choose Edit.
Note
By default, servers do not have any associated workflows. You use the Additional details section to associate a workflow with the selected server.
-
On the Edit additional details page, in the Managed workflows section, select a workflow to be run on all uploads.
Note
If you do not already have a workflow, choose Create a new Workflow to create one.
-
Choose the workflow ID to use.
-
Choose an execution role. This is the role that Transfer Family assumes when executing the workflow's steps. For more information, see IAM policies for workflows. Choose Save.

-
Note
If you no longer want a workflow to be associated with the server, you can remove the association. For details, see Remove a workflow from a Transfer Family server.
To execute a workflow
To execute a workflow, you upload a file to a Transfer Family server that you configured with an associated workflow.
Note
Anytime you remove a workflow from a server and replace it with a new one, or update server configuration (which impacts a workflow's execution role), you must wait approximately 10 minutes before executing the new workflow. The Transfer Family server caches the workflow details, and it takes 10 minutes for the server to refresh its cache.
Additionally, you must log out of any active SFTP sessions, and then log back in after the 10-minute waiting period to see the changes.
Example
# Execute a workflow
> sftp bob@s-1234567890abcdef0.server.transfer.us-east-1.amazonaws.com

Connected to s-1234567890abcdef0.server.transfer.us-east-1.amazonaws.com.
sftp> put doc1.pdf
Uploading doc1.pdf to /amzn-s3-demo-bucket/home/users/bob/doc1.pdf
doc1.pdf                                                                    100% 5013KB 601.0KB/s   00:08
sftp> exit
>
After your file has been uploaded, the action defined is performed on your file. For example, if your workflow contains a copy step, the file is copied to the location that you defined in that step. You can use Amazon CloudWatch Logs to track the steps that executed and their execution status.
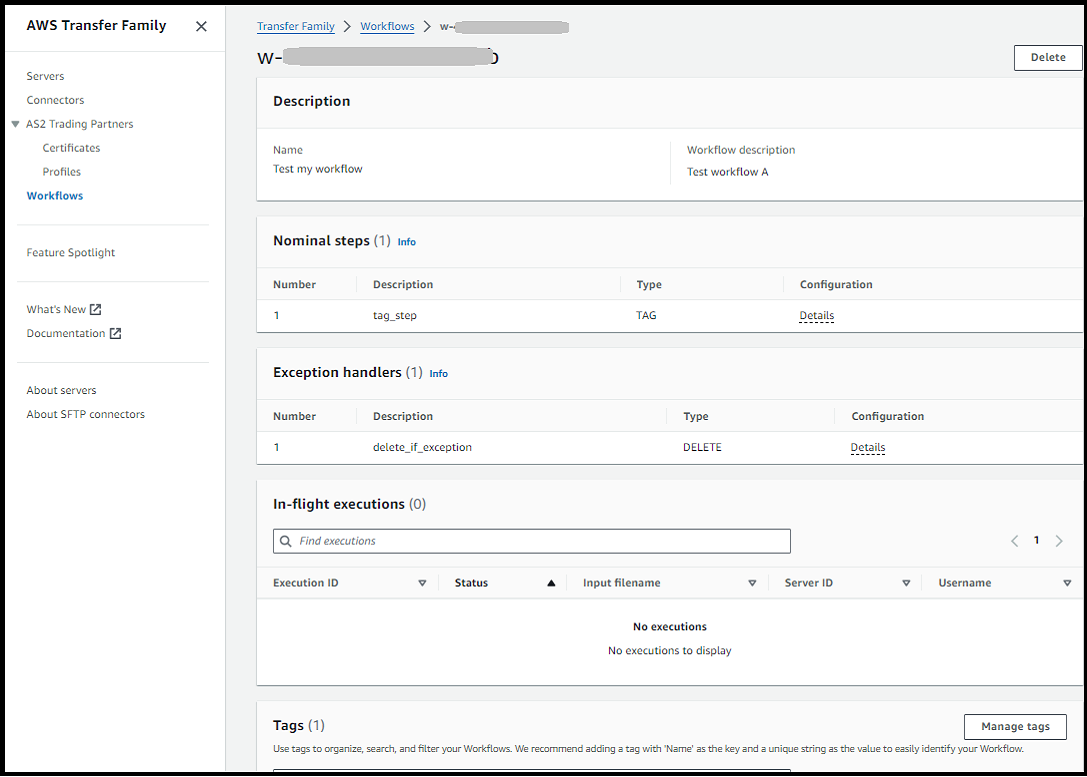
View workflow details
You can view details about previously created workflows or to workflow executions. To view these details, you can use the console or the AWS Command Line Interface (AWS CLI).
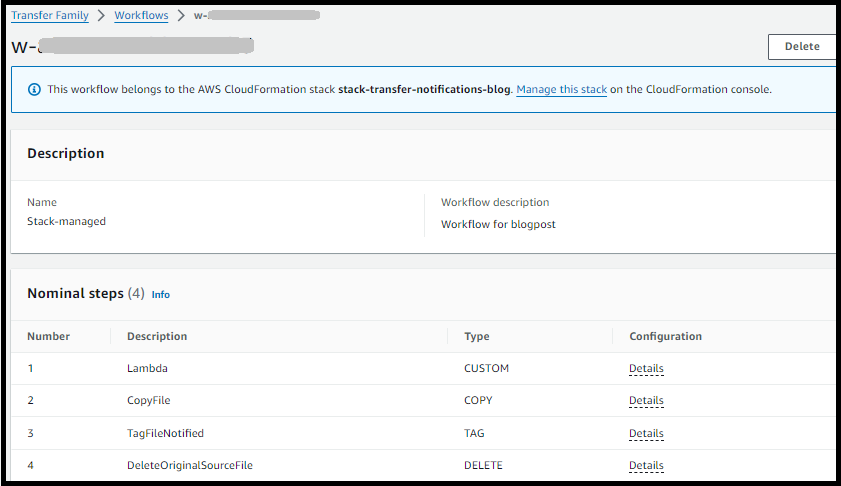
If your workflow was created as part of an AWS CloudFormation stack, you can manage the
workflow using the CloudFormation console (https://console.aws.amazon.com/cloudformation