Step 2: Create a Stack
Important
The AWS OpsWorks Stacks service reached end of life on May 26, 2024 and has been disabled for both new and existing customers.
We strongly recommend customers migrate their workloads to other solutions as soon as possible. If you have questions about migration, reach out to the AWS Support Team on AWS re:Post
You will use the OpsWorks Stacks console to create a stack. A stack is a collection of instances and related AWS resources that have a common purpose and that you want to manage together. (For more information, see Stacks.) For this walkthrough, there is only one instance.
Before you begin, complete the prerequisites if you haven't already.
To create the stack
-
Sign in to the AWS Management Console and open the OpsWorks console at https://console.aws.amazon.com/opsworks/
. -
Do any of the following, if they apply:
-
If the Welcome to OpsWorks Stacks page is displayed, choose Add your first stack or Add your first OpsWorks Stacks stack (both choices do the same thing). The Add stack page is displayed.
-
If the OpsWorks Dashboard page is displayed, choose Add stack. The Add stack page is displayed.
-
-
With the Add stack page displayed, choose Chef 12 stack if it is not already chosen for you.
-
In the Stack name box, type a name, for example
MyLinuxDemoStack. (You can type a different name, but be sure to substitute it forMyLinuxDemoStackthroughout this walkthrough.) -
For Region, choose US West (Oregon).
-
For VPC, do one of the following:
-
If a VPC is available, choose it. (For more information, see Running a Stack in a VPC.)
-
Otherwise, choose No VPC.
-
-
For Default operating system, choose Linux and Ubuntu 18.04 LTS.
-
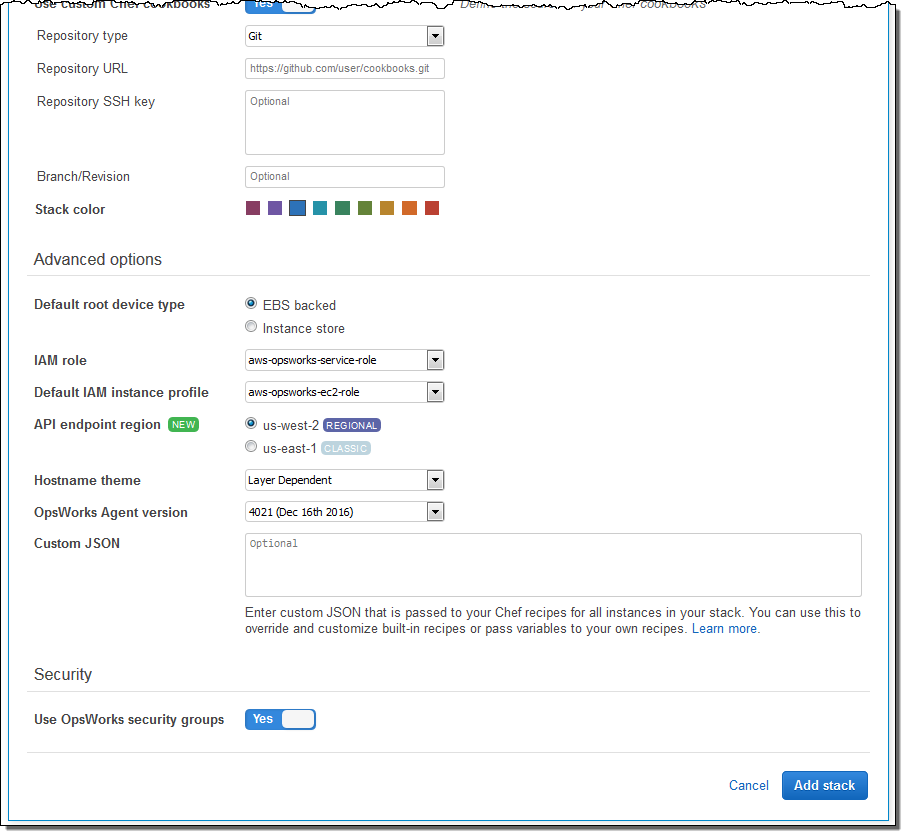
For Use custom Chef cookbooks, choose Yes.
-
For Repository type, choose Http Archive.
-
For Repository URL, type
https://s3.amazonaws.com/opsworks-demo-assets/opsworks-linux-demo-cookbooks-nodejs.tar.gz -
Leave the defaults for the following:
-
Default Availability Zone (us-west-2a)
-
Default SSH key (Do not use a default SSH key)
-
User name (blank)
-
Password (blank)
-
Stack color (dark blue)
-
-
Choose Advanced.
-
For IAM role, do one of the following (for more information, see Allowing OpsWorks Stacks to Act on Your Behalf):
-
If aws-opsworks-service-role is available, choose it.
-
If aws-opsworks-service-role is not available, choose New IAM role.
-
-
For Default IAM instance profile, do one of the following (for more information, see Specifying Permissions for Apps Running on EC2 instances):
-
If aws-opsworks-ec2-role is available, choose it.
-
If aws-opsworks-ec2-role is not available, choose New IAM instance profile.
-
-
For API endpoint region, choose the regional API endpoint with which you want the stack to be associated. If you want the stack to be in the US West (Oregon) Region within the US East (N. Virginia) regional endpoint, choose us-east-1. If you want the stack to be both in the US West (Oregon) Region and associated with the US West (Oregon) regional endpoint, choose us-west-2.
Note
The US East (N. Virginia) regional endpoint includes older AWS Regions for backward compatibility, but it is a best practice to choose the regional endpoint that is closest to where you manage AWS. For more information, see Region Support.
-
Leave the defaults for the following:
-
Default root device type (EBS backed)
-
Hostname theme (Layer Dependent)
-
OpsWorks Agent version (most recent version)
-
Custom JSON (blank)
-
Use OpsWorks security groups (Yes)
-
-
Your results should match the following screenshots except for perhaps VPC, IAM role, and Default IAM instance profile:

-
Choose Add Stack. OpsWorks Stacks creates the stack and displays the MyLinuxDemoStack page.
You now have a stack with the correct settings for this walkthrough.
In the next step, you will add a layer to the stack.
