Add users to Amazon Connect
When you add users to Amazon Connect, you can configure them with information appropriate to their roles. For example, you specify their security profile, which indicates the tasks they can perform in Amazon Connect admin website. For agents you specify their routing profile, which indicates the contacts that can be routed to them.
This topic explains how to add users using the Amazon Connect admin website. To add users programmatically, see CreateUser in the Amazon Connect API Reference Guide. To use the CLI, see create-user.
Add a user individually
-
Log in to the Amazon Connect admin website at https://
instance name.my.connect.aws/. Use an Admin account, or an account assigned to a security profile that has Users - Create permission. -
In Amazon Connect, on the left navigation menu, choose Users, User management.
-
Choose Add new users.
-
Choose Create and set up a new user and then choose Next.
-
Enter the name, email address, secondary email address, mobile number, and password for the user.
Note
SAML users don't have primary email addresses, they have username logins. A username login is typically an email address but it doesn't have to be. For these users the field label Email address is empty inside Amazon Connect. When email notifications are sent for SAML users, they must have a secondary email configured in order to get it. If a secondary email is not configured, the user won't receive the email.
Tip
Mobile number is not currently used by Amazon Connect.
-
Choose a routing profile and a security profile.
-
Optionally, add tags to identify, organize, search for, filter, and control who can access this hours of operation record. For more information, see Add tags to resources in Amazon Connect.
-
Choose Save. If the Save button isn't active, it means you're logged in with an Amazon Connect account that doesn't have the required security profile permissions.
To fix this issue, log in with an account that is assigned to the Amazon Connect Admin security profile. Or, ask another Admin to help.
-
For information about adding agents, see Configure the agent's profiles and task settings in Amazon Connect.
Add users in bulk from a .csv file
You can add up to 1000 users at a time by using a .csv file.
Note
Avoid adding too many unique resources in the .csv file. For example, don't add more than 100 different routing profiles. This may cause a timeout or failure during the validation process.
Bulk upload is for adding new records, not for editing existing records. To edit user records in bulk, see Edit users in bulk in Amazon Connect.
Use these steps to add several users from a .csv file such as an Excel spreadsheet.
-
Log in to Amazon Connect with an Admin account, or an account assigned to a security profile that has Users - Create permission.
-
In Amazon Connect, on the left navigation menu, choose Users, User management.
-
Choose Add new users.
-
Choose Import users using a .csv template and then choose .csv template.
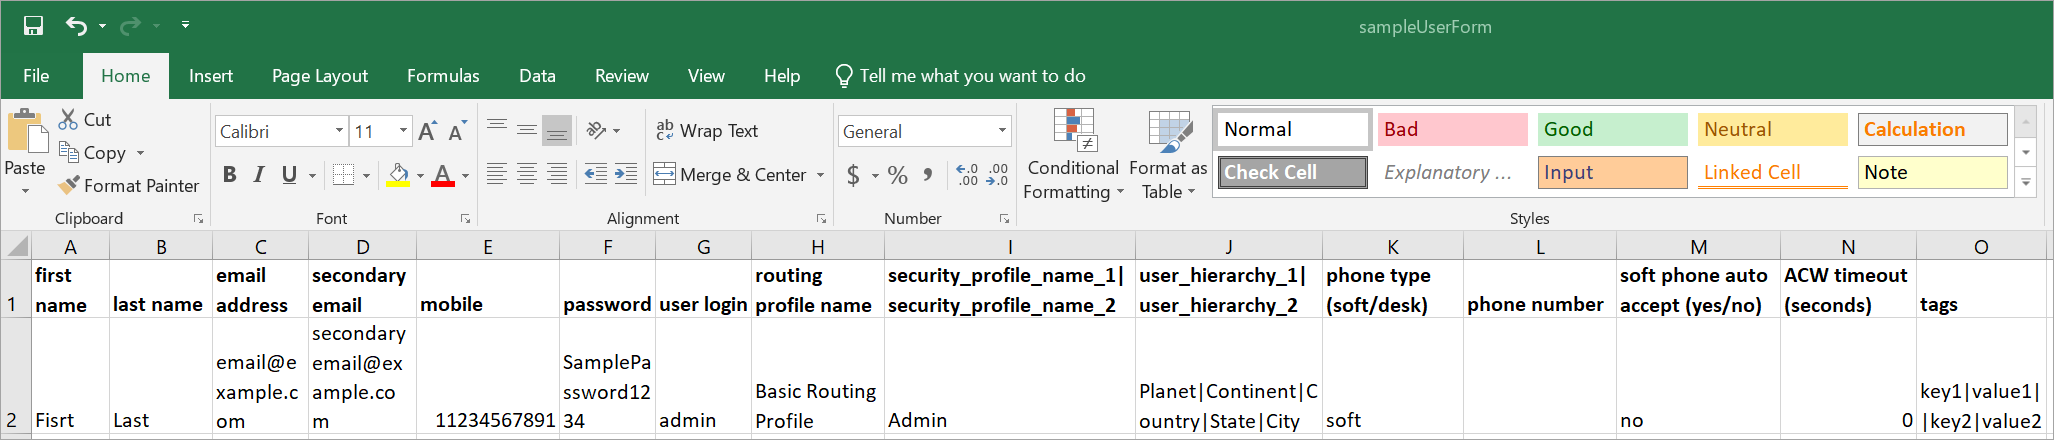
The .csv template has the following columns in the first row:
-
first name
-
last name
-
email address
-
secondary email address
-
mobile: This is not currently used by Amazon Connect.
-
password
-
user login
-
agent hierarchy
-
routing profile name
-
security_profile_name_1|security_profile_name_2
-
user_hierarchy_1|user_hierarchy_2
-
phone type (soft/desk)
-
phone number
-
soft phone auto accept (yes/no)
-
ACW timeout (seconds)
-
tags
The following image shows a sample of what the .csv template looks like in an Excel spreadsheet. The first row in the spreadsheet contains the column headings, and the second row contains sample user data.
-
-
Add your users to the template and upload it to Amazon Connect. Choose Upload file and verify.
-
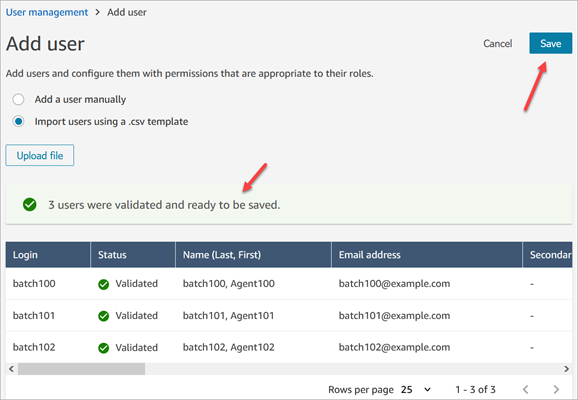
Amazon Connect validates the data in the file. Choose Save to create the new user records.
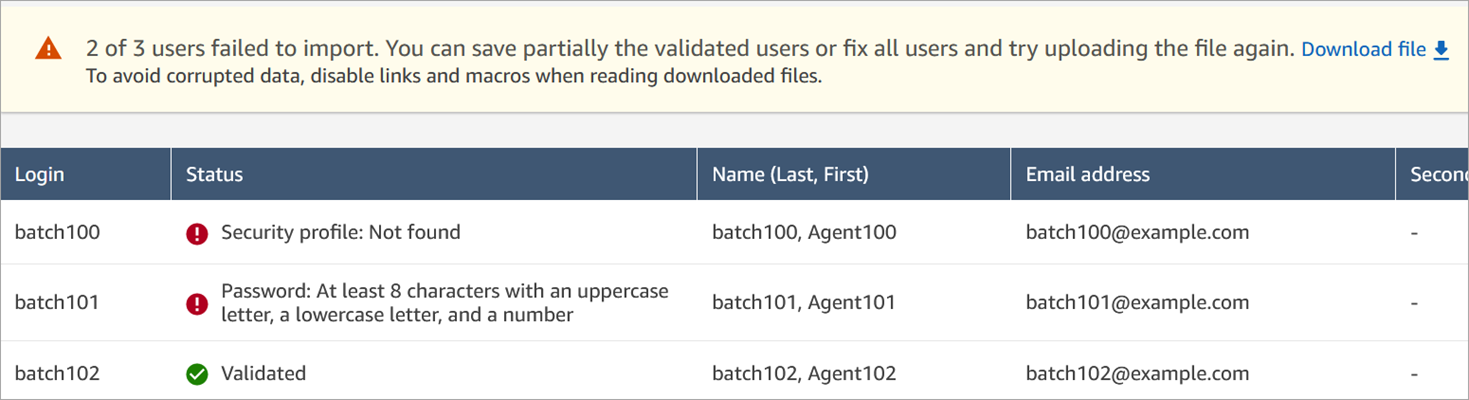
If you get a validation error message, it usually indicates that one of the required columns is missing information, or there's a typo in one of the cells.
The following image shows an example validation error message. In this case, the security profile was misspelled and a password didn't meet requirements.
-
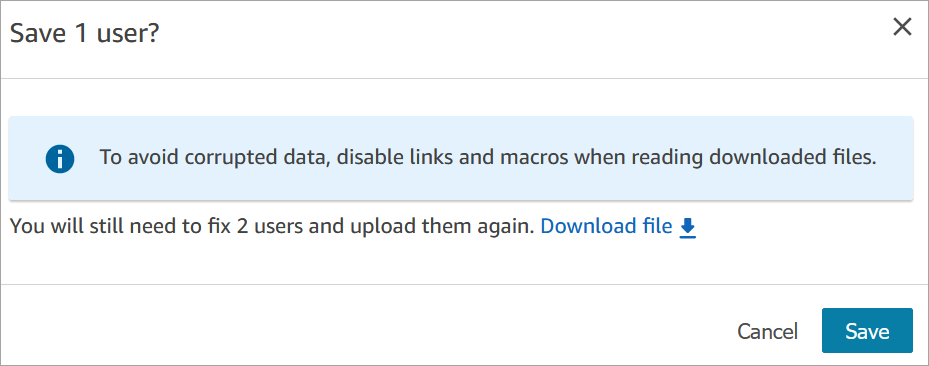
To upload only the validated user records, choose Save. A dialog box prompts you for confirmation.
-
A banner displays the status of the upload and confirms when it's complete.
Tip
While a batch of additions is being processed, you can continue working on the User management page, choosing another batch of user records to create, edit, or delete, in bulk or individually. This is useful for quickly updating settings such as routing profiles for groups of agents.
Amazon Connect sequentially processes the records in bulk.
-
Choose Refresh to update the User management page with the users that have been created.

Required permissions for adding users
Before you can add users to Amazon Connect, you need the following permissions assigned to your security profile: Users - Create. The following image shows that this security profile permission is in the Users and permissions section of the Add/Edit security profile page.

By default, the Amazon Connect Admin security profile has these permissions.
For information about how to add more permissions to an existing security profile, see Update security profiles in Amazon Connect.
